The Artsy Addict Kitchen Sink The Artsy Addict Lick My Spoon The Artsy Addict Snaps N' Shots The Artsy Addict Cozy Cottage The Artsy Addict Paper Pretties The Artsy Addict

Tuesday, July 1, 2014

Bundle & Save - Blog Hop


Welcome! Welcome! So Excited to be blogging with these cute gals again! We are featuring some awesome bundle and save items this month! When you buy items in a bundle you save an additional 15% off! WOW!

Today, I'm sharing some creations from the Starburst Bundle  (found on page 117 of the annual catalog). There are soooo many cute projects made with this bundle! It has become one of my favs!

For my first project I thought it would be fun to get you all in the spirit of 4th of july! 

Oh, Happy Day! Celebrate Freedom Card


....a little closer look


...on the inside


Stamps
Starburst Sayings - 133185 pg. 117
Framelits, Embosslits, Dies, Punches, and Embossing
Starbursts Framelits - 132967 - pg. 231
*New* Little Pieces Embosslits - 133733 pg. 229
*New* Little Letters - 133730 - pg. 228
Chevron Border Pumch - 132154 - pg. 222
Arrows Embossing Folder - 132187 - pg. 226
Papers and Cardstocks
Very Vanilla Cardstock - 101650 - pg. 183
Real Red Cardstock - 102482 - pg. 180
Night of Navy Cardstock - 100867 - pg. 182
Backgrounds Designer Series Paper pg.185
                       Brights - 130134
                       Regals  - 130139
Ink
Real Red Pad - 126949 - pg. 180
Night of Navy - 126970 - pg. 182
Real Red Marker - 100052 - pg. 180
Night of Navy Marker - 100069 - pg. 182
Accessories
Rhinestone Basic Jewels - 119246 - pg. 209
Tools & Other Supplies
Big Shot Die-Cutting - 113439 - pg. 215
Stampin' Trimmer - 126889 - pg. 216
Tiny Wave Rotary Cutting Blade - 129409 - pg. 217
Paper Snips - 103579 - pg. 215
Stamping Sponge - 101610 - pg. 210
Stampin; Dimensionals - 104430 - pg.204
*New* - Fast Fuse Adhesive - 129026 pg. 204 - This is the amazing sticky strip in a dispenser. Love it!


My next project I made for a quarterly shoebox swap that one of my BFF's and upline, Cheryl Curtis, invited me too. I met a lot of talented ladies! I can't wait for the next swap! It was so much FUN!


....from the side


Stamps
Starburst Sayings - 133185 pg. 117
Positively Chevron - 130499 - pg. 175
Framelits, Embosslits, Dies, Punches, and Embossing
Starburst Framelits - 132967 - pg. 231
Designer Rosette Bigz XL - 125594 - pg. 233
Arrows Embossing Folder - 132187 - pg. 226
Stylish Stripes Embossing Folder - 132174 - 226
Chevron Embossing Folder - 127749 - pg. 226
Perfect Polka Dots Embossing Folder - 117335 - pg. 226
1" Circle Punch - 119868 - pg. 221
Papers and Cardstocks
Very Vanilla Cardstock - 101650 - pg. 183
Rich Razzleberry Cardstock - 115316 - pg. 180
Calypso Coral Cardstock - 122925 - pg. 181
Coastal Cabana Cardstock - 131297 - pg. 179
Basic Gray Cardstock - 121044 - pg. 183
Ink
Rich Razzleberry Pad -  126950 - pg. 180
Coastal Cabana Pad - 131175 - pg. 179
Calypso Coral Pad - 126983 - pg. 181
Accessories
1/8" Mini Brads - 122941 - pg. 209
Coastal Cabana Thick Baker's Twine - 135638 - pg. 207
Tools & Other Supplies
Big Shot Die-Cutting - 113439 - pg. 215
Paper Snips - 103579 - pg. 215
Stampin; Dimensionals - 104430 - pg.204
*New* - Fast Fuse Adhesive - 129026 pg. 204 - This is the amazing sticky strip in a dispenser. Love it!
Hot Glue Gun

Thanks for stopping by! Comments are always welcome! 
For more inspiring projects please click the link below to see what wonderful ideas Julie has in-store for you!

WANT TO SHOP FOR ITEMS FROM MY PROJECTS?

CLICK MY BUTTON BELOW :)



Monday, June 2, 2014

New Catalog - Blog Hop


Hello! I guess you could say, I've been on a very long crafting and blogging hiatus!  It has been hard since this  is a much needed outlet for me! I'm really looking forward to joining a group of creative friends doing a monthly blog hop. It will give me an excuse to create something new and blog about it too. Woot! Woot!

Inspiration makes me giddy, leaving me feeling refreshed and excited! Sometimes it is the photos you take, the projects you make, or even sharing about your day. I hope you will find some of that here to make your day a little brighter and inspired! Now, let's get to the good stuff...


For my first project, I am featuring some really exciting products...Psst... some of them are from the new catalog...which you can order from TODAY!!!! WOOT!!! WOOT!!! Okay, I might use that word a lot, but it's really exciting stuff!!!

 So here's the project....


Waalaaa! 

Part 2 - Here is a comparison with the stamp image...


and here is a close up....


List of products, Item numbers, and annual catalog page numbers where you can find the items I used for this project:

Stamps
Blended Bloom - 135906 - pg. 167
Lots of thanks - 129690 - pg. 150
Die Cutting
Apothecary Accents - 127003 - pg. 230
Paper 
Very Vanilla Cardstock - 101650 - pg. 183
Fancy Foil Designer Vellum - 133363 - pg. 193
Blackberry Bliss Cardstock - 133675 - pg. 179 
                       or
***Highly Recommend*** - 2014-2015 In Colors Cardstock and Pad Kit - 133673 - pg. 179
Ink
*New* - Blackberry Bliss Stampin' Pad - 133642 - pg. 179
*New* - Blackberry Bliss Marker (Stampin' Write Markers) - 133654 - pg. 179
VersaMark Pad - 102283 - pg. 210
Accessories
Blackberry Bliss 3/8" Stitched Ribbon - 133668 - pg. 207
OH MY MY!!! THIS RIBBON IS ADDICTING! It adds so much to your projects and a very easy handling ribbon, no fuss. I love that!
Gold Embossing Powder - 109129 - pg. 213
Tools
Big Shot Die-Cutting - 113439 - pg. 215
Paper Snips - 103579 - pg. 215
Stamping Sponge - 101610 - pg. 210
*New* - Fast Fuse Adhesive - 129026 pg. 204 - This is the amazing sticky strip in a dispenser. Love it!
Sticky Strip - 104294 - pg. 204
Embossing Heat Tool - 129053 - pg. 213
Embossing Buddy - 103083 - pg. 213
E-Cutter - to cut pillow box


So this is the part where my sweet husband brought me warm homemade cookies and milk. Seriously! They were amazing, only problem... my laptop decided it wanted my milk more than I did! Yep! Sniff! Sniff! All of my pictures and items to finish out my blog post... on the laptop. Sigh! So we have scheduled an appoinment with the computer doctor and I'm crossing my fingers that we can save it! I will keep you posted! If it survives, I will have more pictures to post later! Feeling lucky that it saved the first picture for you, otherwise, it would be a really sad morning. Well... it's still a little sad...but I'm trying to be optimistic! Part 2 - My Husband and the computer doctor saved the day!!! Yay!!! Computer is not doing so hot but they were able to back up my work from the last few days! Woot! Woot! LOL! 


For my second project, I am really excited to show you one of the new MDS Project Life Kits. Oh my filled with goodness! These kits have so many options and things you can do to make really FUN digital projects or even print parts to add to your handmade cards, etc. 

Here is an invite I made! Of course, for safety purposes I have changed the "real" address of the event but you get the idea. Hope you enjoy!


I've included a little sample of some of the designs and cards from the kit I used to make my invite. If you click on the image, it will take you to all the Project Life MDS items available. 


I hope you all have a wonderful day! Please let me know what you think about the projects!


Now... off to your next adventure!

Click the "Next Blog" Link Below


Sunday, July 28, 2013

Blooming with Kindness Fancy Fold Card Tutorial

Hi there!

After receiving many email requests asking how I made the Blooming with Kindness Fancy Fold Card, I have decided to post a tutorial. I know a few of you needed the instructions ASAP for your card groups that are coming up, so please excuse the pictures. They were taken with my iPhone instead of the Nikon. Also, A HUGE Thank You for all of you who have emailed me. I appreciate your emails and comments. I value your feedback so please feel free to leave comments.

Here is the finished design of the card that I'm going to show you how to make. :)


Inside...


I want to let those of you who are going to use this for classes that this card was designed for 2012-2013 SU Convention WOW Swap. At that time, all of the items I used were in the current catalog and or permission for use (ex. Electronic Cutter). Some of the items have now been discontinued. I will make a notation by the items that are not available in the new 2013-2014 catalog. You may decide you want to switch those items up for new current product. 

Items you will need for this card:
Stamps: Blooming with Kindness

Cardstock: Raspberry Ripple, Whisper White, & Basic Black

Ink: Raspberry Ripple Pad, Always Artichoke Marker

Accessories & Tools: 


  • Scallop Circle Bigz Die
  • 3 3/4" Circle - used Electronic Cutter
  • 1 1/2"Scallop Square Punch discontinued
  • 1-1/4" Square Punch discontinued
  • Scallop Edge Border Punch
  • 3 - Pearl Basic Jewels
  • Designer Frames Oval Embossing Folder
  • Vanilla Shimmer Smooch Spritz


Tips: 

Assembling can be kind of tricky, I recommend prepping all pieces to your card before putting it together.

Each Step will have a * by it.

* Cut a piece of Basic Black Cardstock 7 1/4" X 5 1/2" as shown in picture below

We will be labeling this piece

Part 1 of 2 Card Base


* Score your paper 4 1/4" from the right side

* Use scallop border to punch  edge on left side.

see picture below


* Using Raspberry Ripple Cardstock, Cut 2 1/2" x 5 1/4"

* Then, emboss your cardstock using the Fancy Fan Embossing Folder 

See Below


Using Basic Black Cardstock, Punch 1 1/2" Scallop Square

See Below


Also using Basic Black Cardstock, Cut Scallop Circle with the Scallop Circle Die

* Score straight line 8 scallops towards middle of circle

See dotted scoring line in picture below


Using Whisper White Cardstock, Cut 4" x 5 1/4"

* Emboss in the middle of the 4" width using the Oval Designer Frames Embossing Folder

See Below


Also using Whisper White Cardstock, Cut Circle 3 3/4"...

(I used my E-Cutter to complete this portion of the project)

Then, Cut 9/16"off side of circle

As shown in picture below


Now for the best part, Stamping Time!

You will want to Stamp all your images now.

1. Flower - Raspberry Ripple Ink & Always Artichoke Marker
Offset your image to the left when stamping, don't stamp image in the middle.

2. Your kindness make such a difference sentiment - Raspberry Ripple Ink
Stamp image in the very center of the oval

3. Thank you sentiment - Raspberry Ripple Ink, Whisper White Cardstock
Stamp image on paper about 1 1/2"  from edge of paper so that you will have room to punch.

See image below


Using your 1 1/4" Square Punch upside down, line your image up in the center of the square
 to punch image straight - (no picture shown)

You're almost there! Just a few last things to do...

Assembling your card

Apply adhesive every where to both sides of the small portion of your scallop circle that has been scored.   

When reviewing the picture below you should be putting adhesive on everything below the dotted line in the picture, on both sides. For the remainder of the tutorial I will be calling this the "Flap" on the circle.


* Take your Scallop Circle and your 4"x 5 1/4" Whisper White Cardstock 
(with the Embossed Oval and Sentiment)

* Center your scalloped Circle between the 5 1/4"right side of card stock. Once centered, wrap the "Flap" of the circle around the back of the whisper white cardstock to adhere both card stock shapes together 

as shown below

This will now be labeled as

 Part 2 of 2 of  Card Base


Now take your Base Part 1 

shown below


and...

Base Part 2 which we just created

* Adhere the white Cardstock to 4 1/4" section of the black card stock

there is a 1/4" border edge on the black cardstock, so please center accordingly

see image below


Yay! It's now in one piece! Now we just need to Doll It Up! 

*Fold over your left flap, adhere your Raspberry Ripple card stock

*Adhere your Thank you sentiment square to the top of your black scallop square

*Add Stampin' Dimensionals to the left top and right bottom of the back of the square.

* before adhering scallop square to card, close right flap (the scalloped circle) on the card and overlap the square to keep the card closed, then adhere the scallop square in that place on the card.


* You will then adhere your flower on the scalloped circle, leaving a small black edge to the right of the card. Add 3 Pearls to the bottom of the white circle.

Lay card out flat with all flaps open and spray with Smooch Spritz.

WaLaa! You now have an Fancy Fold Elegant Card!

I used this same concept to create the card shown below for a WOW swap for 2013 SU Convention. As you can see I switch up the product to make it current. :)


Hope you had a Great Time! Thanks for stopping by! Enjoy!

If you have any further questions about this card, please feel free to leave me comments or send me an email. :) theartsyaddict@live.com


Until next time, Happy Crafting!

DISCLAIMER

This is my personal blog, and I am responsible for its content. Stampin' Up! does not endorse the use of or contents of the tutorials, classes, services, or non-Stampin' Up! products I may offer here.
You are welcome to draw inspiration from my designs, but please give credit where it is due. Please do not copy my designs and pass them off as your own. Thank you kindly!

Thursday, July 18, 2013

WOW Sneak Peeks for SU Convention 2013

My intentions were really good this year prepping for SU Convention. I had big plans to have recipes and tutorials on all my WOW Swaps before convention started, LOL who was I kidding!!! I'm still working on projects tonight and convention has already begun. This year I really got myself in pretty deep with my designs and there was noooo way I had enough time to make them all myself, I'm pretty sure my whole family has decided no convention next year after helping me assemble my swaps, and they're not kidding around!! The banner flower card (shown below) has 16 Heart A Flutter banner cuts, just for one card. No big deal, right? I only made 100 of them... so 1600 cuts later... and 100 rosettes later... I think everyone in the family, including myself, is very happy to be done making this card. Here is a little sneak peek... and don't fret! I am planning on posting the recipes and tutorials for these cards, just not until after convention, LOL! Please let me know what you think! Hope you enjoy! :)


Banner Flower Card... in a few different colors...


Lily Card, can you believe I actually colored the Lily on SU White card stock? I didn't have any water color paper so I decided to give it a try. It was definitely tricky trying to do the blending but it all worked out! I was definitely ready to be done coloring after 100 lilies though. 


This card was inspired by an SU Convention Card I made last year. I promised a tutorial to one of my followers using the same concept but a different card. I will be posting a tutorial soon! :)


My Adventures Opening Night of Stampin' Up Convention 2013

Wow! The FUN has begun! Tonight was opening night at Convention 2013! It was a BLAST but might I say, there are alot of crazy women!! hahaha I'm mean really alot!!! I decided from years past, I always have way too much stuff to carry, so my awesome sister borrowed me her Cropper Hopper. Yay!!! Thank You!!! I was soooo freakin' excited to have something to wheel around all my goodies in. As I walked through convention, all the crazy ladies were looking at me like I was a genius! They all looked so tired from all there shopping and goodie bags they had dangling all of them. I was feeling pretty awesome and smart! :) Then, it started to get serious! You could see the envy in there eyes, bad enough I wasn't so sure I wasn't going to get the cropper mugged from me!!! I'm not kidding!! And then for the really good part... LOL!  Let's just say, I think you might need a license to drive one of those things around at convention with 5,800 crazy ladies running around... they are sooo busy oooohhhing and aaaawwwwing over all the banners and decor in the air, they seem to miss the cropper even though it is less that a foot from me, they did not pay any attention!!! I definitely experienced cropper crash course 101 driving it around tonight. LOL! & I'm a little embarrassed to admit it, but I may have ran over a few toes in the process...LOL!... Sorry if they were yours!!! 

The stage looks absolutely awesome! Displayed in the picture below is Super FaBuLoUs Shelli Gardner, with the stage display of this years theme, "Be the Difference."


 Even Ronald McDonald came for a visit tonight! Yep, the real deal! He got a little choked up sharing a story about a little girl he worked with about 20 years ago, which of course, made me tear up too. It was so heart warming to see the difference we can make by selling the Ronald McDonald set, which is absolutely aDoRaBLe this year, see for yourself!!!


Just so you can see how cute, I've attached some pictures of projects they made during opening session


If you were not able to make it, are you feeling a little left out??? Well guess what!!? I've attached a link so you can watch the whole opening session for yourself!! Eeeek! Super Exciting! Enjoy! More to come tomorrow, so be sure to check back on all the FUN!


Sunday, January 20, 2013

Sharing Time

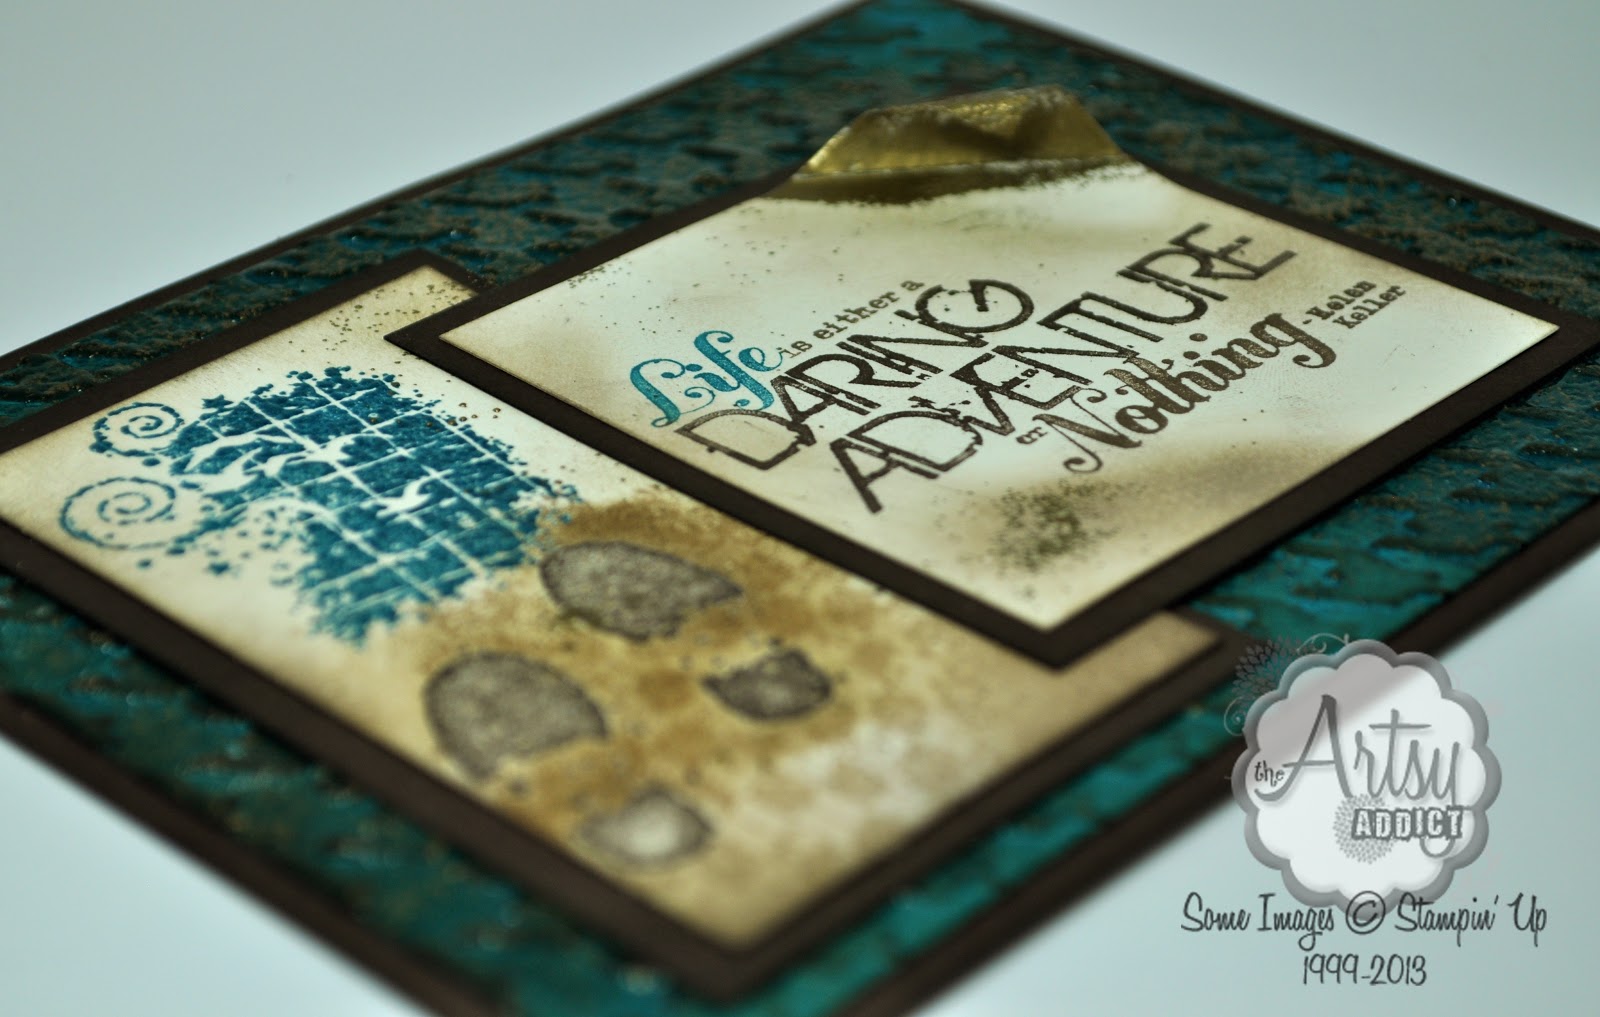
Here is my next sharing time... I'm know 2 posts in the same day, woot woot, right? LOL!  This masculine card, I also made for a swap. If you like it or not I would love to hear from you! Please feel free to leave comments. Have A Great Day!


Stamps: Clockworks, Daring Adventure

Paper: Island Indigo, Early Expresso, Very Vanilla

Ink: Crumb Cake, Soft Suede, Early Expresso, Island Indigo

Accessories: Houndstooth Embossing Folder, Clear & Gold Embossing Powder, VersaMark Pad

Stage Fright & Sharing Time

Hi There,

I hope I'm not the only one in saying this...but I tend to get stage fright when sharing the ideas I've designed sometimes. I see so many amazing ideas on Pinterest and blogs that it makes me feel my ideas aren't really all that great. I get so excited and inspired when others share there ideas! & I really want to be part of that. So one of my goals this year is to come out of my shell for sharing time. 

So to start, here is a card I designed months ago for Stampin' Up Convention as one of my swaps. I hope you like it! :)


Inside...


Stamps: Blooming with Kindness

Paper: Raspberry Ripple, Whisper White, & Basic Black

Ink: Raspberry Ripple, Always Artichoke

Accessories & Tools: Scallop Circle Bigz Die, Scallop Square Punch, 1-1/4" Square Punch, Scallop Edge Border Punch,  Pearl Basic Jewels, Designer Frames Embossing Folder, Vanilla Shimmer Smooch Spritz

All of these products can be found in the current 2012-2013 Stampin' Up Catalog.

Wednesday, December 26, 2012

Stampin' Up Card Club 2013 Open Seating

An invite to all who live locally in the Salt Lake Area: Anyone who needs a Mommy timeout or some girl time and wants to make cute cards... I will be starting a Stampin' Up Card Club for 2013. Every other month we get together and make cards. The cards are pre-designed and pre-cut ready for you to assemble. Each month we teach you new techniques and ideas to take home. You get your cards FREE but are required to spend only $25 in Stampin' Up product each time we meet (6 times a year). You also get a turn to received the hostess benefits. We do ask you to commit for a year which is 6 meets. If you want to join the club, please let me know via email by January 5th. Our first meet we'll be Saturday, January 26th at 10:00. Then we'll be meeting the 2nd Saturday of every other month, starting in March. It's alot of FUN! & a good way to meet some new crafty friends! Space is limited and it will be first come first serve. If you have any other questions, please send me a message. theartsyaddict@live.com :) HaPpY Holidays!

Saturday, December 8, 2012

Winner of Drawing


The winner of the facebook drawing is...drum roll please.... Hailey Fawson. Thanks again to all of you! Happy Holidays! :)

Wednesday, December 5, 2012

A FaBuLoUs Drawing to say THANK YOU


I just wanted to send a THANK YOU to all the people who have "liked" my facebook page. To say Thanks, I'll be doing a drawing this weekend for a set of Peppermint Stands. Another way to say thanks... I've even made them all pretty so you don't have
 to find time to make them during the busy holiday season. :) Everyone who has liked the The Artsy Addict page by Friday, December 7th at midnight, will be entered to win. Thanks again! & Happy Holidays!


Wednesday, November 14, 2012

Merry Christmas Banner


Hi there! Today I’m going to be doing a tutorial on this cute Merry Christmas banner. Hope you all enjoy and have a great holiday season!


Products and Tools:

10 – Wood Label Banners

Coordinating Paper, Paint, & Glitter

Wood Glue

I used these 4 colors of paint:


& BoBunny Mistletoe Coordinating Papers


Step 1: Trace Block Letters


              Tools: a sharp pencil to trace your banners
          Use the backside of the paper you want to display when tracing. 
           Press and hold the wood with one hand so that your image doesn’t shift while tracing. With the other hand, trace around the image. Before moving the wood look to make sure that your trace has not shifted, otherwise when you cut it out, it will not fit correctly. Great Job! Tracing is one of the trickiest parts. You can relax a little and have some FUN now! 
          Note: Always trace before painting! If you forget you'll have tracing marks around the wood and will need to go back and touch up. It creates an extra step and takes more time.

           Also Note: When working with a large number of pieces it helps to number the wood and paper so that when you go to assemble the pieces they match as perfectly as when you traced them. There is usually some variation with the wood so this helps you to not be playing the matching game when trying to glue your paper to the wood. See picture below 


Step 2: Prep Wood

If your wood has any unsmooth surfaces you’ll want to sand your wood before painting. 


Step 3: Paint Wood

              Tools: paint & sponge brush 
  
              Paint ½ inch border around the front of the banners

              Paint complete sides and backs of banners for a more completed project.


 Step 4: Cut Paper


              Tools: a pair of scissors to cut your banners and to do any trimming. I find it easier to cut detailed areas, etc. with a smaller pair of scissors

              Cut letters right on the line that you traced. Don’t worry if when you lay down your image on the wood if it is a little smaller or larger than the block. I'll teach you in a later step how to disguise your imperfections.


Step 5: Distress Paper

              Tools: Everyone has there own technique and tools for distressing. I prefer to use what I call a cat eye.  It is a small inkpad that is in the shape of a cat eye. Color Box is the company that makes them. I usually recommend chalk only ink, pigment inks are a little too harsh when distressing. The only exceptions I make with this is if you really want the Black or Dark Brown to really be solid and pop, then use a pigment ink. We carrying these in The Wood Connection. If you need to distress with a color you don't have, you can use a technique called dry brushing. 
Distressing with ink pad
               Take your cat eye or distress tool and flick around all the edges of the paper. Start very light and if you want more, you can add. It’s always better to have too little than too much.
Dry Brush Distressing
             Wood Connection has an awesome tutorial on how to do this. For more information, you can click this link... Dry Brush Distressing.


Step 6: Glue Paper to Wood

              Tools: you’ll need Darice Wood Glue and sponge brush for this portion of the project.  

              Sponge wood glue on the front of one piece of wood at a time. ***Try to use it sparingly, a thin layer, not too much. It will cause your paper to bubble after you adhere it, if you put too much on. *** 
              Once you put the glue on the wood, line up starting on one side and add your paper. Be sure to press firmly all along the surface to prevent bubbling. Repeat same steps on all of your wood.

              As you’re adhering your paper to each piece of wood, continue to go back and put pressure on areas that may be starting to bubble on past wood. With pressure you can, in most cases, work out bubbles that seem to form. I have found that with less glue, fewer bubbles form.

Step 7: Glitter Letters

Wood Connection has an awesome tutorial on how to glitter wood, for more information click the link... Glittering Wood.


 Step 8: Glue Wood to Wood

Now you’ll want to glue your banners together to create a three-dimensional look.


Step 9: Create Christmas Banner


           Tools: Banner Punches, Smooth cardstock, Stamps, Embossing Powder, Embossing Gun, Mini Hole Punch, Distressors, Ribbons, 3 Dimensional Adhesives, etc.


            Note: If you have more questions about the "Christmas" banner portion of this project, you can email me at theartsyaddict@live.com.


  A BIG THANKS to the Wood Connection for allowing me the opportunity to guest post! A $25 gift certificate will be given when you enter the raffle on The Wood Connection Blog

 Until next time... Happy Crafting & Happy Holidays!